| |
|
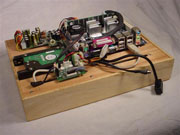
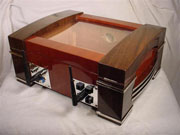
The
completed project. My initial intention
was to go "full stealth" but for
reasons unknown to me I insisted on leaving
a few clues to the underlying functionality.
I should know better than to argue with
myself. Can you see the clues?
|
|
|
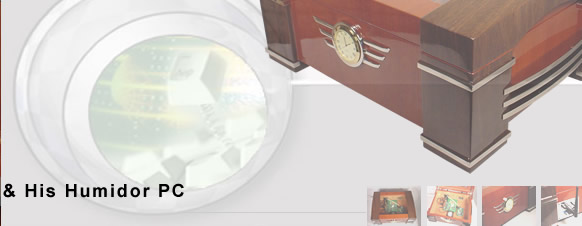
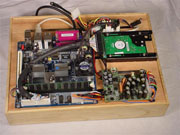
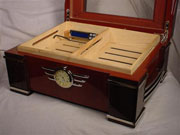
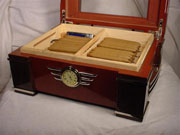
The
computer. Yes, this is the entire computer
portion of the project. The humidor case,
as most humidors do, has a removable Spanish
cedar tray that allows for a greater capacity
of cigars. The computer components are installed
onto the bottom, yes bottom, of the tray.
The tray is fully functional and can be
removed, plugged in and operated independently
from the rest of the mod. |
|
|
|
A
tour, clockwise, from top left. The power
supply. I operate it at 60W in this
application but it is capable of 150W using
a higher capacity external "brick".
The mainboard. VIA CL10000 with Nehemiah
core, 256MB of DDR
memory and a much quieter fan than stock.
The Crystalfontz 631 LCD daughter board.
At this writing it is unavailable to the
public. It provides an attachment point
for the 631's optional ATX power control,
fan control and temperature sensing cables.
The daughter board itself is connected by
cable to the main LCD
display. The 631 was designed to fit
into a 3.5" bay. Space constraints
required Crystalfontz to break the PCB into
two parts. The actual display is mounted
directly on the other side of the tray.
The hard
drive. I started with a 3.5" 120GB
drive. There is room for it but I was concerned
about cable clearance issues when the tray
was mounted to the lower section. I decided
to eliminate the issue by using a 40GB Toshiba
2.5" drive. |
 |
|
Reverse
shot of component tray. |
| |
|
Flipped
over. The Crystalfontz 631 display is seen
mounted with an attached digital thermometer
sticking out from it. All the components
on the other side are mounted to the wood
using brass PCB spacers. On this side I
threaded brass acorn nuts onto the exposed
threads. This provided the additional strength
that was going to be required for shipping
the unit. Lessons learned.
|
| |
|
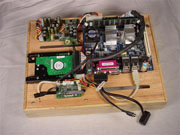
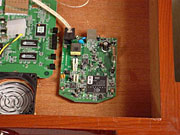
Moving
on to the lower case. This is a naked Linksys
wireless router with a 4-port hub mounted
to the bottom of the inside of the humidor.
Removing the external plastic case sure
did reduce the size of the unit but it also
exposes it to "electrical events".
This is my second unit, having let out the
magic blue smoke from the other. |
|
|
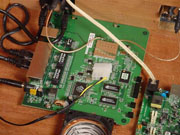
This
is a naked Linksys USB ADSL modem. I originally
used a Speedstream unit but after letting
smoke out on one and having difficulties
powering another one I decided to go with
a USB powered unit. |
|
|
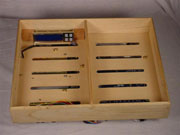
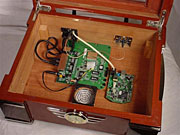
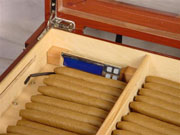
Overview
of lower components. The fan looking thing
is the shroud from a 60mm fan. You have probably
figured out by now that the CL10000 board
is mounted upside down. The 40mm CPU
fan fits down into this shroud allowing
it to take a suction directly from the cool
outside air. The humidor has a clearance of
3/4" so airflow is not a problem. Also
seen in this picture are the two Linksys antenna
cables leading to the back of the box. Ethernet
cables are also routed from the hub to
the back. The white cable is a phone line
bringing the DSL signal to the modem. |
 |
|
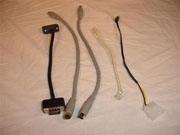
The
keys to this mod. Short cables. The first
humidors I built had simple holes in the back
of the case to pass cables through. This allowed
me to position the mainboard anywhere I wanted
inside the box. The downside of this design,
besides being ugly, was "hard-wired"
cabling had to be used. I was rightfully criticized
for this. I responded with the V series, which
has the traditional back plate scheme but
this caused me to lose the freedom of placing
the components where I thought they were best
suited. For this project I used a hybrid scheme
where I install pass-through I/O plates on
the back of the humidor and run short lengths
of cable inside the piece from the components
to the I/O plate. The server role of the piece
lends itself to this design because servers
traditionally don't need a lot of I/O. Pictured
here is the VGA, PS2, ADSL (regular phone
line) and a special cable I built. It provides
12V power from a computer Molex connector
to the Linksys routers DC barrel plug.
|
 |
|
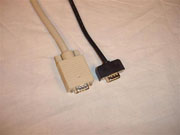
The
VGA cable is the showstopper. Without this
8" little jewel this mod project would
not have happened. The only place on the planet
you can get one of these things is at Hall
Research Technologies. Lauren listened to
my pitch and graciously sent me a cable to
use. This picture shows the cable next to
a regular VGA cable. Slim cable, abbreviated
head and short length. They also make longer
lengths. Big shout out to Hall Research.
|
 |
|
Coming
together. The tray rests on supports and all
the cables are attached. |
|
|
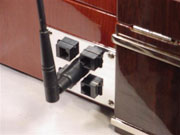
Back
side shot showing the chrome I/O plates and
twin Linksys antennas. I was very prepared
to cut a cooling hole between the two plates
but after extensive testing I found it wasn't
necessary. I was surprised. Apparently there
is enough leakage around the lid to allow
the hot air to escape. It ran between 100
to 110 degrees F inside the case and the CPU
temp wasn't an issue because it got direct
outside air. Another big reason for the low
temps was the steady state server role.
|
 |
|
This
is the KVM
port.
The plates came from L-com Connectivity Products.
They were supposed to be part of a modular
19" rack connection system. I chromed
them and drilled a hole in the center for
the antennas. |
 |
|
This
is the Ethernet port. Four pass through plugs.
Three are for wired connections to a home
system or computers without wireless facilities.
The fourth (top left) is actually the pass
through for the DSL phone line. Yes, you can
plug an RJ-11 into an RJ-45. |
 |
|
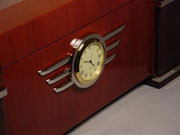
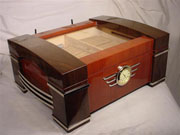
The
original humidor hygrometer was a cheesy little
plastic thing. I wanted a nice thermometer
but I couldn't find one as nice as this clock.
|
 |
|
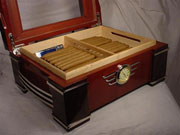
Here
it is with the props onboard. I got tired
of hearing "where do you put the cigars"?
Now I get "won't they get ruined in there"?
Yes, they will get ruined. It is still not
a functioning cigar humidor because of the
high heat and low humidity. I'm sure it can
be done but not on a reasonable budget.
|
 |
|
Here
is close up of the Crystalfontz 631. It comes
with either a black or brushed aluminum faceplate.
I like the raw chrome frame because it blends
into the art deco theme. I also did some other
surgery on the mounting bracket to fit my
needs. The top right hand button is the power
switch and the one below it is the reset switch.
The LCD normally displays the case air temperature
and automatically adjusts the speed of the
CPU fan accordingly.
|
 |
|
Glamour
shot. |
 |
|
Final
glamour shot. |
| |
| |
|
|